

In a previous article we took a look at menu bars in iPadOS and macOS 26. The new operating systems bring some big changes – of particular interest here is menu bars for the first time on the iPad. We outlined new features and differences between the two systems, and some of the issues apps may encounter when using menu bars.
In this article we take a look at how to use SwiftUI to add and improve your menus on iPad and Mac apps. This article is meant as a resource for SwiftUI developers, but may be of interest to non-developers by outlining some of the possibilities of menu design in Apple apps.
iPad
If you create a default SwiftUI app in Xcode (iOS App Template from New->Project…) you’ll get a simple Hello World app that can run on iOS, iPadOS and MacOS (Designed for iPad).
Running the app on iPad you will see a default menu available by pulling down at the top of the screen.

There are two ways to add or modify these menu items in SwiftUI:
commandsmodifier on theWindowsGroupbuildMenumethod override on theAppDelegate
The commands modifier method is the “pure” SwiftUI solution, and has the advantage that the same code can be used in a pure SwiftUI Mac app if you choose to develop one later. So we’ll concentrate on this solution here – at least initially.
The commands modifier is placed on any Scene in your app, and allows you to simply add CommandGroup and CommandMenu to manipulate the menu bar.
Adding New Menus
Using CommandMenu, we can create a simple View of Button that will represent the menu items in our new menu.
import SwiftUI
@main
struct MyAppApp: App {
var body: some Scene {
WindowGroup {
ContentView()
}
.commands {
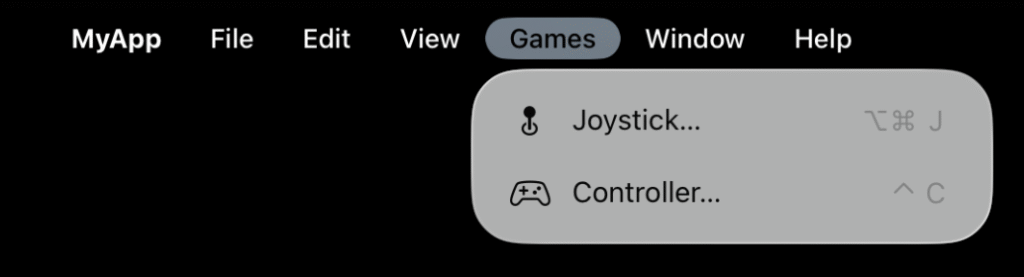
CommandMenu("Games") {
Button("Joystick…", systemImage: "arcade.stick") {
// Some Action
}
Button("Controller…", systemImage: "gamecontroller") {
// Some Action
}
}
}
}
}
The menu will be added after the View menu.
You can easily add keyboard shortcuts with the keyboardShortcut modifier.
import SwiftUI

@main
struct MyAppApp: App {
    var body: some Scene {
        WindowGroup {
            ContentView()
        }
        .commands {
            CommandMenu("Games") {
                Button("Joystick…", systemImage: "arcade.stick") {
                    // Some Action
                }
                .keyboardShortcut(KeyEquivalent("j"), modifiers: [.command, .option])
                Button("Controller…", systemImage: "gamecontroller") {
                    // Some Action
                }
                .keyboardShortcut(KeyEquivalent("c"), modifiers: .control)
            }
        }
    }
}
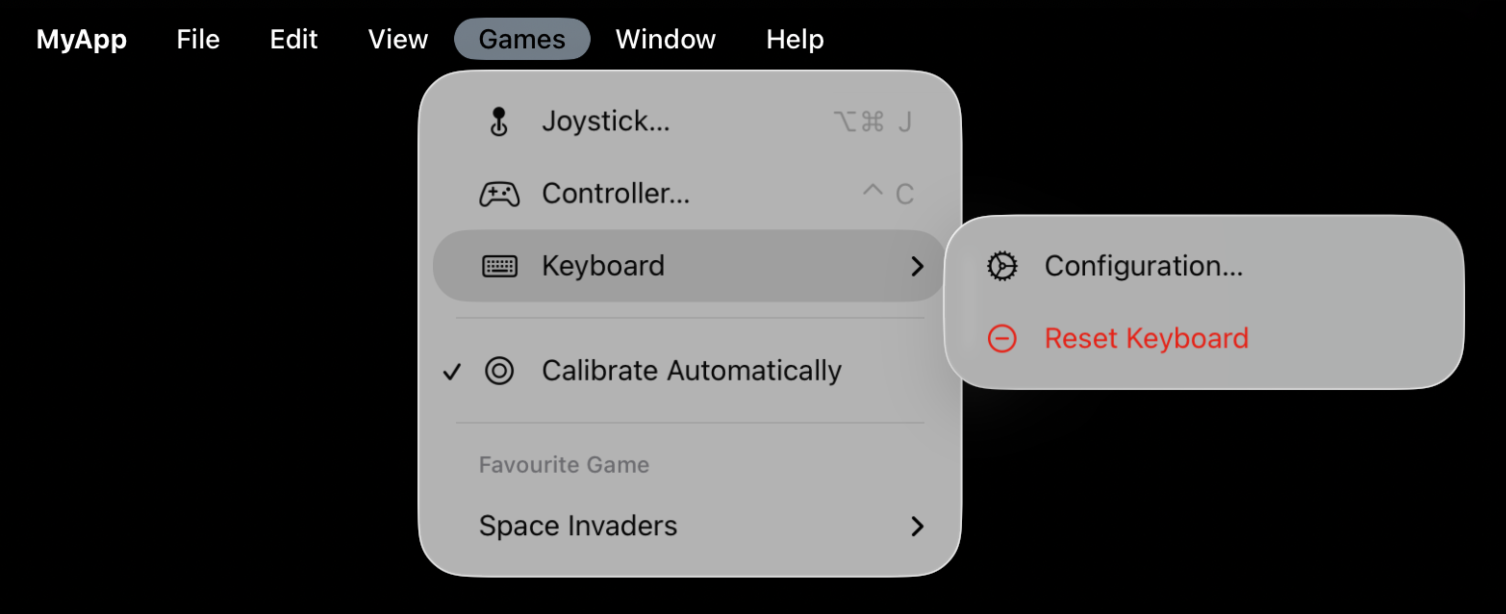
And if you want to get fancy, you can use other constructs such as Divider, Section, Toggle and even sub-menus (using Menu).
import SwiftUI

@main
struct MyAppApp: App {

    var games = ["Space Invaders", "Pac-Man", "Dig Dug", "Pooyan"]
    @State private var favouriteGame: String = "Space Invaders"
    @State private var calibrate: Bool = true

    var body: some Scene {
        WindowGroup {
            ContentView()
        }
        .commands {
            CommandMenu("Games") {
                Button("Joystick…", systemImage: "arcade.stick") {
                    // Some Action
                }
                .keyboardShortcut(KeyEquivalent("j"), modifiers: [.command, .option])
                Button("Controller…", systemImage: "gamecontroller") {
                    // Some Action
                }
                .keyboardShortcut(KeyEquivalent("c"), modifiers: .control)
                Menu("Keyboard", systemImage: "keyboard") {
                    Button("Configuration…", systemImage: "gear") {
                        // Some Action
                    }
                    Button("Reset Keyboard", systemImage: "minus.circle", role: .destructive) {
                        // Some Action
                    }
                }
                Divider()
                Toggle("Calibrate Automatically", systemImage: "circle.circle", isOn: $calibrate)
                Section("Favourite Game") {
                    Menu(favouriteGame) {
                        ForEach(games, id: \.self) { game in
                            Button(game, action: {
                                favouriteGame = game
                            })
                        }
                    }
                }
            }
        }
    }
}
Adding to Existing Menus
You can use CommandGroup to add one or more menu items to an existing menu. You can add before or after an existing menu item (from a list in CommandGroupPlacement). For example, suppose we wanted to add a Load Game… option to our File menu. You can do this as follows.
import SwiftUI

@main
struct MyAppApp: App {
    var body: some Scene {
        WindowGroup {
            ContentView()
        }
        .commands {
            CommandGroup(before: .newItem) {
                Button("Load Game…", systemImage: "arcade.stick") {
                    // Some Action
                }
            }
        }
    }
}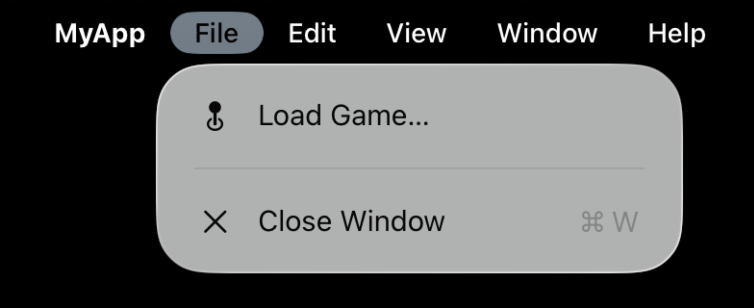
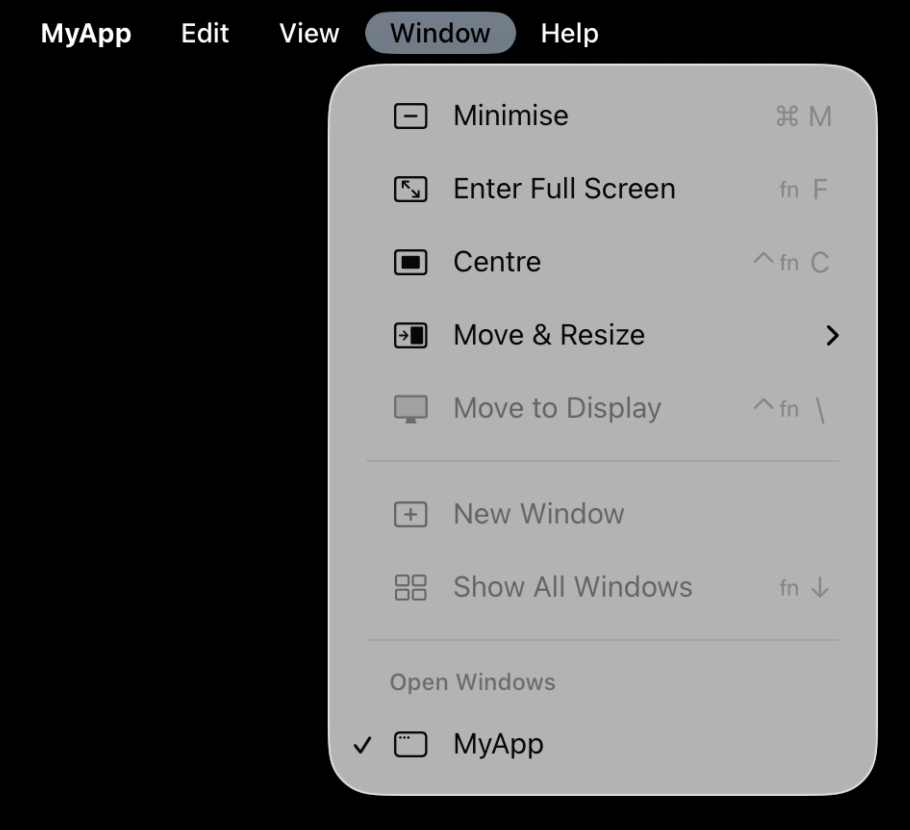
Here I’ve added this menu item before .newItem. Note that it adds this to the File menu even though .newItem is in the Window menu on iPad. The behaviour here is subtly different on the Mac verses iPad.
You can add a group of menu items in one CommandGroup. For example, we can add two items to the Help menu:
import SwiftUI

@main
struct MyAppApp: App {
    var body: some Scene {
        WindowGroup {
            ContentView()
        }
        .commands {
            CommandGroup(after: .help) {
                Button("Gaming History", systemImage: "timelapse") {
                    // Some Action
                }
                Button("How to Play", systemImage: "questionmark.circle") {
                    // Some Action
                }
            }
        }
    }
}
Once again, the behaviour on the Mac is slightly different.
Divider and Section views work for iPadOS, but do not work for Mac Catalyst or Designed for iPad Mac apps. This appears to be a bug in Apple’s implementation, especially given they work on macOS, and Apple’s own guidelines tell you to use a separator when adding extra information to the Help menu.
Replacing Existing Menus
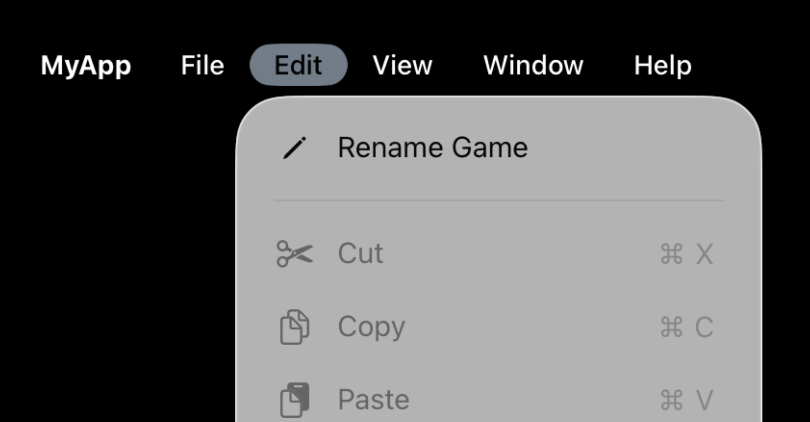
It is possible to replace a menu item. For example, if your app doesn’t support Undo/Redo you could replace the Undo/Redo menu items with some other action of your own.
import SwiftUI

@main
struct MyAppApp: App {
    var body: some Scene {
        WindowGroup {
            ContentView()
        }
        .commands {
            CommandGroup(replacing: .undoRedo) {
                Button("Rename Game", systemImage: "pencil") {
                    // Some Action
                }
            }
        }
    }
}
Removing Menu Items and Top-Level Menus
The obvious solution to removing a menu item would be to replace it with an EmptyView. Unfortunately, as of the first release of iPadOS 26 this does not work. There is a hack that works by replacing items with a Divider, but I would not recommend this as if Apple ever fixes CommandGroup to actually work with Divider it may add extra separators to your menus.
Also, CommandGroupPlacement has no placement items for replacing entire top-level menus if you need to do this. And there are valid reasons to want to do this.
A way to do this that does work is to use a buildMenu method override on your AppDelegate.
In your App declaration, use the property wrapper @UIApplicationDelegateAdaptor. SwiftUI instantiates the delegate and will call the delegate’s methods in response to life cycle events. This includes the building of the menu bar.
import SwiftUI

@main
struct MyAppApp: App {

    @UIApplicationDelegateAdaptor private var appDelegate: MyAppDelegate

    var body: some Scene {
        WindowGroup {
            ContentView()
        }
    }
}
Now create a swift file for your delegate (MyAppDelegate.swift).
import UIKit
class MyAppDelegate: UIResponder, UIApplicationDelegate {
override func buildMenu(with builder: UIMenuBuilder) {
super.buildMenu(with: builder)
}
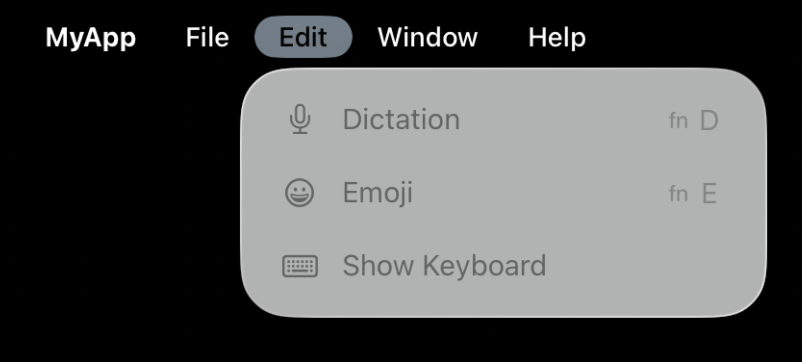
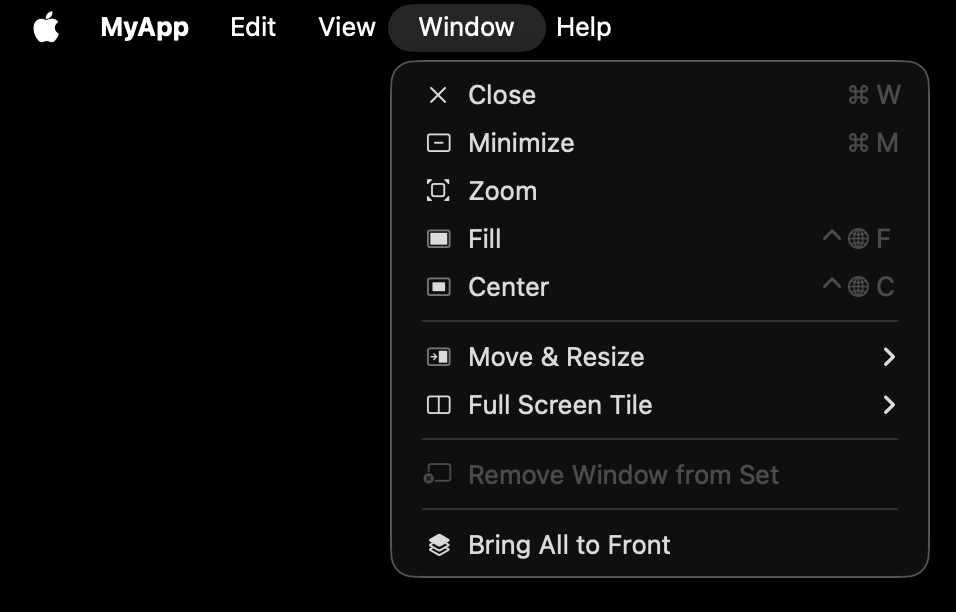
}In the overridden buildMenu we can use builder.remove to remove menu items or even top level menus. For example, if we wanted to remove Undo/Redo and the standard Edit options from the Edit menu, and also remove the View top-level menu, we can do that as follows:
import UIKit

class MyAppDelegate: UIResponder, UIApplicationDelegate {

    override func buildMenu(with builder: UIMenuBuilder) {
        super.buildMenu(with: builder)

        builder.remove(menu: .view)
        builder.remove(menu: .undoRedo)
        builder.remove(menu: .standardEdit)
    }
}
Settings
In the App menu (the menu with the name of your app) there is, by default, a Settings… menu item.
This menu item takes you to your apps page in the Settings app on iPad. If you want to add other settings to this app you can do so by adding a Settings bundle to your Xcode project. See Apple’s pages for details. Note the page has not been updated for a very long time.
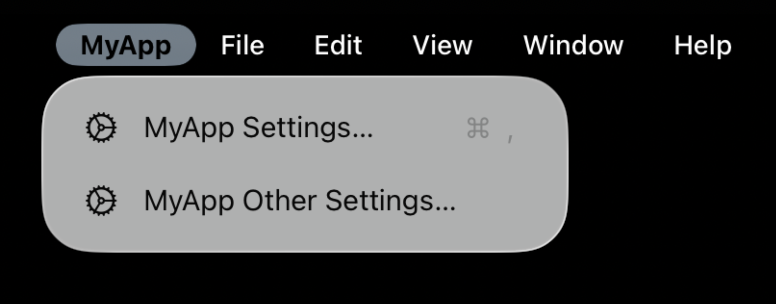
Having your app’s settings in the Settings app is not really a great user experience. Many developers don’t do this, and have their own settings pages in their apps. Apple has been pushing hard since the early days of the iPhone to get people to put app settings in the Settings app. Apple’s documented guidelines are suggesting you add another menu item in the App menu for your other settings. What do you call this? I have no idea. Also, how confusing is it going to be if your app has “MyApp Settings…” and “MyApp Other Settings…“?!
Reserve the YourAppName > Settings menu item for opening your app’s page in iPadOS Settings. If your app includes its own internal preferences area, link to it with a separate menu item beneath Settings in the same group. Place any other custom app-wide configuration options in this section as well.
Apple’s Menu Bar Guidance (June 9 20925)
However, if you want to do this, it is fairly simple using what we’ve seen above.
import SwiftUI

@main
struct MyAppApp: App {
    var body: some Scene {
        WindowGroup {
            ContentView()
        }
        .commands {
            CommandGroup(after: .appSettings) {
                Button("MyApp Other Settings…", systemImage: "gear") {
                    // Present your settings page
                }
            }
        }
    }
}
If you want to just replace the default Settings menu item with your own settings page though, you can.
import SwiftUI
@main
struct MyAppApp: App {
var body: some Scene {
WindowGroup {
ContentView()
}
.commands {
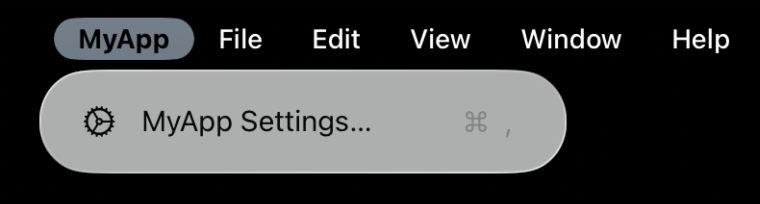
CommandGroup(replacing: .appSettings) {
Button("MyApp Settings…", systemImage: "gear") {
// Some Action
}
.keyboardShortcut(KeyEquivalent(","), modifiers: .command)
}
}
}
}Note that in doing this, your Settings… menu item is no longer localised (it will appear in the language you typed – in my case, English – for users not using your language). There does not appear to be any way to just change the action without changing the Button name. If you care about localisation you will need to localise the text of the new menu yourself. Apple makes this very easy, but you still need to know what to translate the text to for every language you want to support.
Single-Window App
When you create an iPad app in Xcode it is set up by default to use multiple windows. This is why in the Window menu there is a New Window option.
However, you may decide you want your app to be a single-window app. Calculator on the iPad is an example of a single-window app, as is FaceTime.
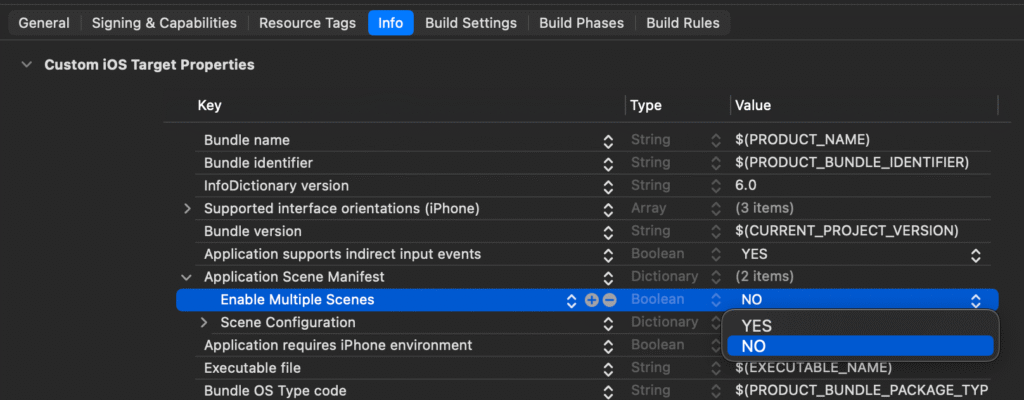
Rather than trying to remove the New Window menu item (which currently does not seem to be possible), the correct way to do this is to go to your info.plist in Xcode, find Application Scene Manifest, expand it and change Enable Multiple Scenes from YES to NO.
A single-window app would generally NOT have a File menu if the app doesn’t deal with files. So using the code above to remove menu items, you could also remove the File menu.
import UIKit

class MyAppDelegate: UIResponder, UIApplicationDelegate {

    override func buildMenu(with builder: UIMenuBuilder) {
        super.buildMenu(with: builder)

        builder.remove(menu: .file)
    }
}
The end result is a single-window app with a simple and clean menu bar. Obviously you could further refine the menu bar if your app doesn’t use other menus such as Edit or View.
Document-Based App
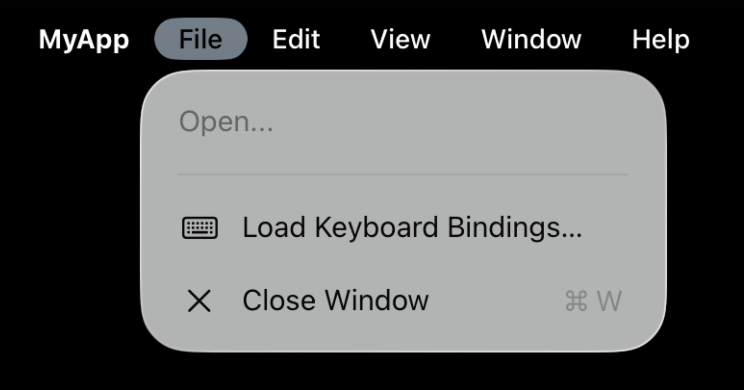
We created a simple app using the default iOS template in Xcode, but if you are working on a Document-based app the process is pretty much the same. Create your app using the Document template. The commands modifier is placed on any Scene in your app, and you simply add CommandGroup and CommandMenu to manipulate the menu bar once more.
import SwiftUI

@main
struct MyAppApp: App {
    var body: some Scene {
        DocumentGroup(newDocument: MyAppDocument()) { file in
            ContentView(document: file.$document)
        }
        .commands {
            CommandGroup(before: .saveItem) {
                Button("Load Keyboard Bindings…", systemImage: "keyboard") {
                    // Some Action
                }
            }
        }
    }
}
A good iPad app should work on the Mac too, and it requires little work to make your iPad app a good Mac-citizen. So don’t stop here – read on.
Mac
The Mac has always had a menu bar since its first incarnation in 1984. The menu bar is very similar to that now on the iPad, but there are some key differences.
- The App menu has many more menu items not available on the iPad. These include the About menu item, Services, the ability to Hide apps, and Quit (exit) an app.

- The File menu, by default, has New Window. This appears in the Window menu on iPad.
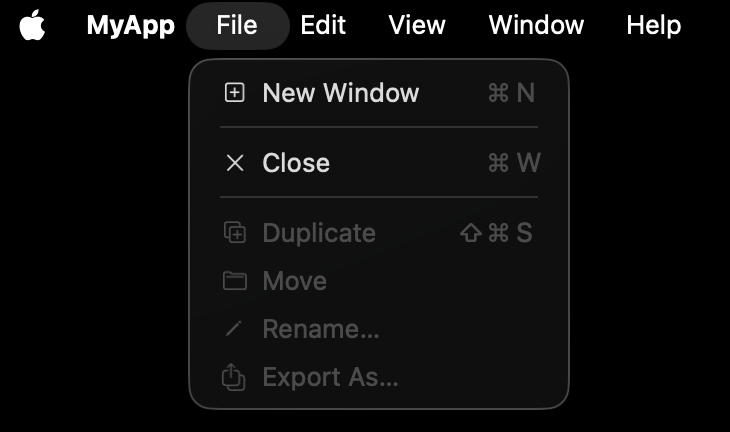
- The View menu has an Enter Full Screen menu item. This appears in the Window menu on iPad.

- The Help menu has a Help menu item. This is not on the iPad by default.

We will cover many of these in detail below.
Mac Apps
There are actually three ways to make Mac apps in SwiftUI. You can choose the type of Mac app you want to produce from Xcode, under your Target’s General->Supported Destinations.

These 3 types are outlined below.
Designed for iPad
By default, all iPad apps can run as a Mac (Designed for iPad) app. You get this for free, so no other work is required.
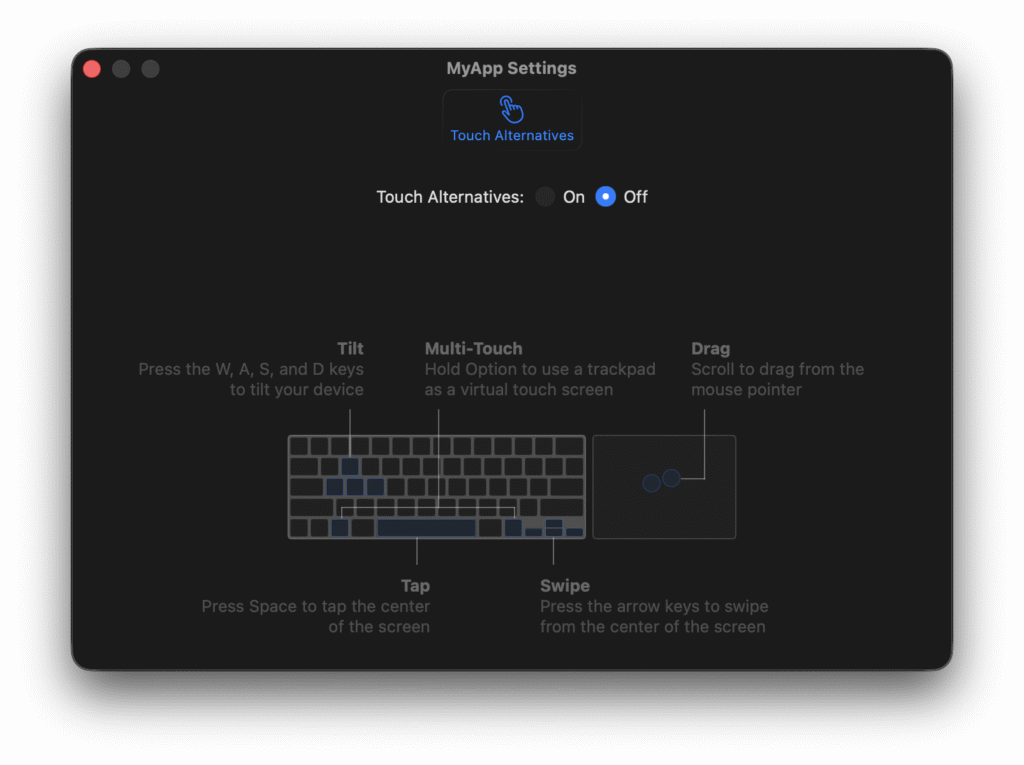
However, this is not a great app. Your app will be one big rectangle and look exactly like it does on the iPad. And the default menus give away that this was a lazy job. For example, the Settings menu will give you a rather ugly extra setting called Touch Alternatives, which screams, “I didn’t bother to do anything to make this a good Mac app”.
The Help menu ends up without specific help and instead a generic macOS Help.

Don’t insult your users. Don’t use this.
Mac Catalyst
Mac Catalyst lets you use UIKit to make your app a native experience. In many cases you need to do very little to your iPad app to make it look and behave better than a Designed for iPad app.
For example, Settings will no longer show the Touch Alternatives panel. And Help will actually have a menu item specifically about your app.
As a bare minimum you should make your app a Mac Catalyst app. As you will see below, you can also make some minor modifications and your app will be better off for it.
AppKit SwiftUI Mac App
Finally, you can make an app that isn’t built from an iPad app. This requires a bit more work. Many things that you do in your iPad app will work fine, but you will come across some classes and functions that are not available here.
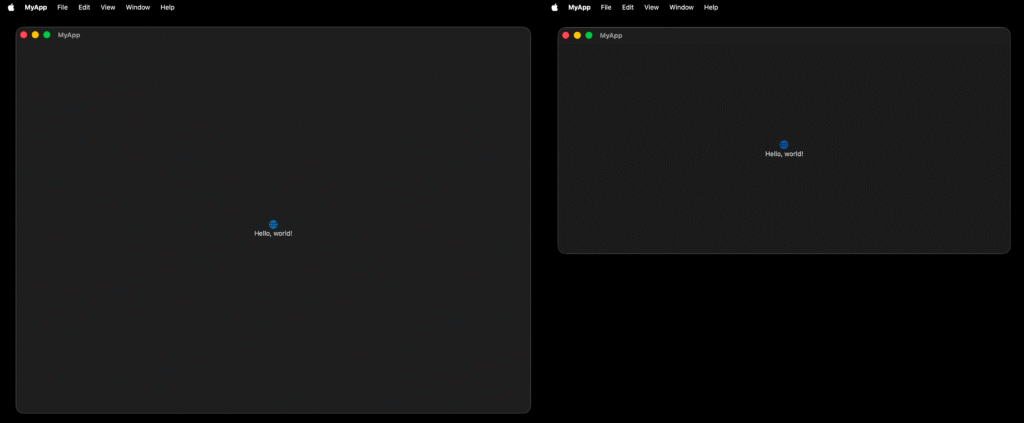
Default window size will be more Mac-like, rather than large iPad dimensioned windows. This is far more pleasing to the eye for a Mac user than a MacCatalyst or Designed for iPad Mac app. There are other, sometimes subtle, difference with an AppKit SwiftUI Mac app.
This is the choice you’d make if you were building a Mac app from scratch in SwiftUI, or if you really want to show your skills and want to make an app that takes advantage of Mac-only features.
Designed for iPad is the laziest of the three, and I would say you should avoid doing this as it makes you look like you don’t care about your Mac users. Given how easy it is to just make, at the very least, a Mac Catalyst app, you should choose that option as a minimum.
Most of the code examples below will work in all three types of Mac apps. Where there are differences I will highlight them.
Adding New Menus
For Mac apps you can add menus in the same way as you do for iPad apps. The same code as above will work no matter the type of Mac app you choose to build. There may be slight rendering differences on the Mac versus the iPad – for example, a Button with a .destructive role will display like an ordinary menu item on Mac, which is different from the red font used on iPad. This may just be a bug and will be fixed in a later update.
Adding to Existing Menus
Once again, for Mac apps the same code can be used as above. Of note, you have access to some menu items that don’t exist on iPad, such as .appInfo, .appTermination, .appVisibility and .systemServices.
If using the same code base for an iPad app and a Mac Catalyst app or a UIKit Mac app, you can make use of #if targetEnvironment(macCatalyst) to handle items only available to Mac Catalyst, or #if os(macOS) for something specific to UIKit Mac apps.
import SwiftUI

@main
struct MyAppApp: App {
    var body: some Scene {
        WindowGroup {
            ContentView()
        }
        .commands {
            #if targetEnvironment(macCatalyst) || os(macOS)
            CommandGroup(before: .appTermination) {
                Button("Run in Terminal", systemImage: "apple.terminal") {
                    // Some Action only on Mac
                }
            }
            #endif
        }
    }
}
For AppKit SwiftUI Mac apps, you can use Divider(). Unfortunately this still does not work for Designed for iPad or Mac Catalyst apps. It works for iPad apps.
Replacing Existing Menus
As with Adding to Existing Menus, for Mac apps the same code can be used as above. Once again, you have access to some menu items that don’t exist on iPad. And AppKit SwiftUI Mac apps can use Divider().
Removing Menu Items and Top-Level Menus
If your Mac app is a Designed for iPad or Mac Catalyst app, then the same code can be used as above.
However, if you are making a UIKit Mac app, things get a little tricky.
First, you can use EmptyView() to replace a menu using CommandGroup. This currently does not work for other Mac apps or iPad apps.
import SwiftUI

@main
struct MyAppApp: App {
    var body: some Scene {
        WindowGroup {
            ContentView()
        }
        .commands {
            // This works for UIKit Mac Apps as of macOS 26 beta 3
            CommandGroup(replacing: .undoRedo) {
                EmptyView()
            }
        }
    }
}
However, to remove entire top-level menus, say, the buildMenu function is not available outside iOS and Mac Catalyst, so you can’t remove items in this way.
There are a number of other ways to remove the items, but they tend to be rather hacky. Until Apple gives us better tools the best I’ve come up with is the following.
In your App declaration, use the property wrapper @NSApplicationDelegateAdaptor. SwiftUI instantiates the delegate and will call the delegate’s methods in response to life cycle events. This is very similar to what was done for the iPad app.
import SwiftUI

@main
struct MyAppApp: App {

    @NSApplicationDelegateAdaptor private var appDelegate: MyAppDelegate

    var body: some Scene {
        WindowGroup {
            ContentView()
        }
    }
}
Now create a swift file for your delegate (MyAppDelegate.swift). When the application finishes launching we hide the menu items we don’t want in the app. This seems the easiest way to deal with this problem as the life cycle tends to put the items back at certain point if you try to actually remove them.
Unfortunately there are no enums to represent the menu items available. If you try to find the items using their title, this will break in other localisations. For my purposes I’ve chosen to hide them based on position to avoid the localisation issue. For example, if you wanted to hide the File and Edit menus, you could do the following.
import AppKit

class MyAppDelegate: NSResponder, NSApplicationDelegate {

    func applicationDidFinishLaunching(_ notification: Notification) {
        // Hide menu items we don't want the user to have access to
        [1, 2] // 1 = File, 2 = Edit
            .compactMap { NSApp.mainMenu?.item(at: $0) }
            .forEach { $0.isHidden = true }
    }
}
About
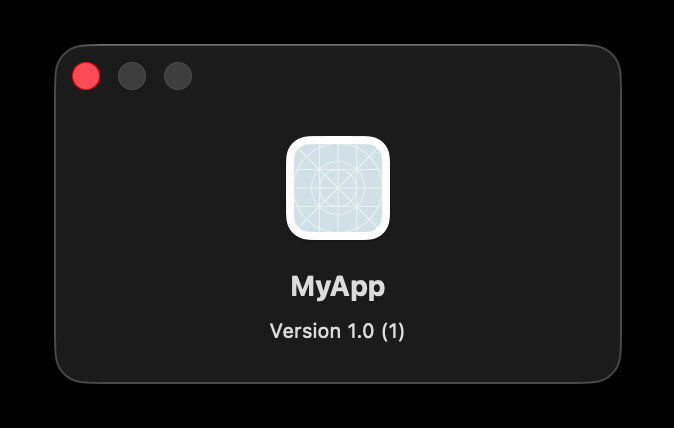
As mentioned, Macs have, by default, an About menu item in the App menu. It has a default implementation that shows your app’s icon, version number and build number.
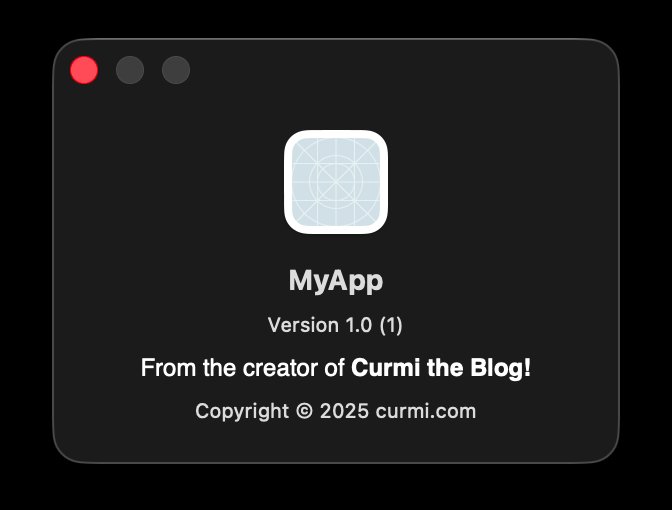
If you are happy with this style, you can easily provide copyright information by editing the info.plist to add a Copyright (human-readable) key.

info.plist
If you want to add even more information, you can make a Credits.rtf, Credits.rtfd or Credits.html file and add that to your Xcode project. The contents of that file will be added to the About window between the version and copyright information.
If you want to create your own About screen, or perhaps you have a SwiftUI panel in your app you’d prefer to present, you can replace the About menu item as we’ve seen before. This has the advantage of potentially giving you an About menu in your iPad app menu too, though keep in mind replacing the menu will lose localisation of the menu text and you’d need to handle that yourself if you want it to remain localised.
Settings
For Designed for Mac and Mac Catalyst apps, Settings works the same way as on the iPad. If you used a Settings Bundle for your iPad app, the Mac version will automatically build a single window with these same settings (since Mac apps don’t have a global Settings app). Unfortunately this can be a little ugly and you don’t have much control over the look of the window.

With some Settings Bundle work you can add a toolbar with different settings sections, but you are quite limited here.
Of course, if you implemented your own settings, these could also be available to your Mac app by replacing the menu item.
For a UIKit SwiftUI Mac app however, you do not get an automatically created settings window from the Settings Bundle. If not replacing the menu with your own you can use a Settings scene in your app to define the View.
import SwiftUI

@main
struct MyAppApp: App {

    @AppStorage("showPreview") private var showPreview = true
    @AppStorage("demoSounds") private var demoSounds = true
    @AppStorage("volume") private var volume = 50.0

    var body: some Scene {
        WindowGroup {
            ContentView()
        }
        Settings {
            // Settings View
        }
    }
}
As you build the View yourself you have complete control over your Settings window, including centring of the window, size, images, tabs and so on. This gives you a lot more control over the look and feel of your settings screen.
import SwiftUI

@main
struct MyAppApp: App {

    @AppStorage("showPreview") private var showPreview = true
    @AppStorage("demoSounds") private var demoSounds = true
    @AppStorage("volume") private var volume = 50.0

    var body: some Scene {
        WindowGroup {
            ContentView()
        }
        Settings {
            TabView {
                Tab("General", systemImage: "gear") {
                    Form {
                        Toggle("Show Game Preview", isOn: $showPreview)
                        Toggle("Demo Sounds", isOn: $showPreview)
                        Slider(value: $volume, in: 0...100) {}
                        minimumValueLabel: {
                            Image(systemName: "speaker.slash")
                        }
                        maximumValueLabel: {
                            Image(systemName: "speaker.wave.3")
                        }
                    }
                }
                Tab("Controller", systemImage: "gamecontroller") {
                    // More Settings...
                }
                Tab("Keyboard", systemImage: "keyboard") {
                    // More Settings...
                }
            }
            .scenePadding()
            .frame(maxWidth: 400, minHeight: 100)
        }
        .defaultPosition(.center)
    }
}
Help
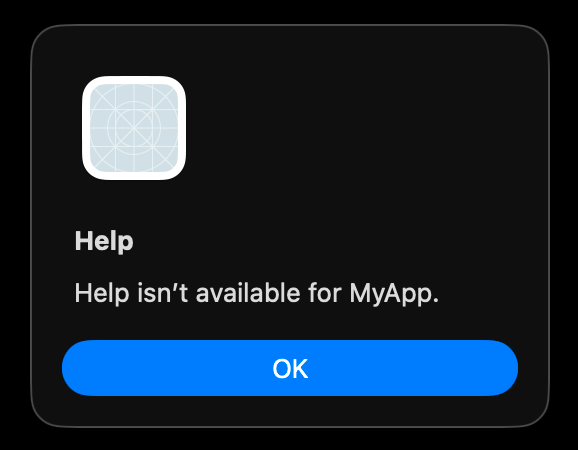
The default Help menu item will display a window telling you your app has no help.
If you want to use this default help system you will need to create Apple Help files. These are viewable from the Help Viewer on the Mac. However, the documentation on this is really old, and most developers these days just open a web browser to their online help pages.
To achieve this in a Designed for iPad or Mac Catalyst app, you can do the following.
import SwiftUI

extension UIApplication {
    @objc func showHelp(_ sender: Any?) {
        UIApplication.shared.open(URL(string: "https://curmi.com")!)
    }
}
Unfortunately this does not work for an AppKit SwiftUI Mac app, and I have not found a similar solution. To work on AppKit Mac apps you’ll need to replace the Help menu. You can also do this for the iPad if you want to add a Help option to the iPad menu bar (which isn’t there by default).
import SwiftUI

@main
struct MyAppApp: App {
    var body: some Scene {
        WindowGroup {
            ContentView()
        }
        .commands {
            CommandGroup(replacing: .help) {
                Button("MyApp Help", systemImage: "questionmark.circle") {
                    #if os(macOS)
                    NSWorkspace.shared.open(URL(string: "https://curmi.com")!)
                    #else
                    UIApplication.shared.open(URL(string: "https://curmi.com")!)
                    #endif
                }
            }
        }
    }
}
Once again note that replacing the menu will lose localisation of the menu text and you’d need to handle that yourself if you want it to remain localised.
Single-Window App
For Designed for iPad and Mac Catalyst apps, you follow the instructions for iPad to achieve a single-window Mac app.
For UIKit SwiftUI Mac apps, you can just change your WindowGroup to a Window scene. You supply a title and id, but all other code remains the same.
import SwiftUI

@main
struct MyAppApp: App {
    var body: some Scene {
        Window("MyApp", id: "myappwindow") {
            ContentView()
        }
    }
}
When using a Window scene, the File menu is removed automatically, with Close correctly moving to the Window menu. So you don’t have to manually remove the File menu.
Bugs
This article was originally based on APIs in beta versions of iOS/macOS 26. It has been updated to meet the release version of iOS/macOS 26 though not many changes were noted. As of this release these are the bugs I’ve noted. They may be fixed in a future release by Apple and I will update as improvements or changes are identified in future releases.
Divider()does not work when adding or replacing menu items in existing top-level menus oniPad,Designed for Mac or Mac Catalyst apps. It does work, however, on UIKit SwiftUI Mac apps.EmptyView()does not work in replacing existing menu items on iPad, Designed for Mac or Mac Catalyst apps. It does work, however, on UIKit SwiftUI Mac apps.- Single-window apps on iPad, Designed for iPad or Mac Catalyst apps have Close in the File menu. For UIKit Mac Apps the Close moves to the Window menu.
- You can’t replace the New Window menu item on iPad apps; doing so adds your new menu item to the File menu. A Mac app will replace New Window, so behaviour will be different when running your app on a Mac.
Hopefully this article has been useful for those of you building great iOS and macOS apps. Keep up the good work.
Very helpful. Thank you!
This is the best, by far, of the code examples showing how to add menus into an iPadOS 26 app. Thank you. 🙏
However, like everyone else, this omits the crucial code – the reason for a menu and Command key is not to call {
// Some action
print(“Button pressed”)
}
but to invoke an existing action which otherwise has to be triggered directly in the interface. I’ve tried calling MyView().addItem() but that does nothing. I don’t know how to grab the existing view and trigger addItem() so what is the secret?
Thanks again.
Hey Stephen. One way you can do this is by changing some state. In your App struct you can put a state variable, say:
struct MyApp: App {
@State var showSettings = false
And pass that to your view that you create in the App, so something like:
var body: some Scene {WindowGroup {
ContentView(showSettings: $showSettings)
}
.commands {
...
// Add a menu here, say, that toggles showSettings
...
Then in your View you have:
struct ContentView: View {...
@Binding var showSettings: Bool
...
And you can use that to show your settings when it gets toggled.
So you can trigger it by changing a bound variable and acting on that.
You could also put the state into an
EnvironmentObject, so that you don’t have to pass it by function.I hope that helps. Let me know.